Thank you to the organizers, volunteers, fundraisers, those who donated, and the participants, for making this year’s Triple Crown for Heart event a huge success! Also, thank you to CBC for covering the event. Rare genetic heart diseases don’t receive the same media exposure or funding for research as other ailments, so the attention is always appreciated.
Check out the CBC coverage, by clicking here, and scrolling forward to 12:44.
Overall, the charity raised $45,127 which will go towards sending children with genetic heart disease to camp . The remaining funds will go towards projects within BC Children’s Hospital Foundation and the Children’s Heart Network.
Among the 210 riders, 25 of them were from Kits Energy, riding either one, two, or all three mountains.
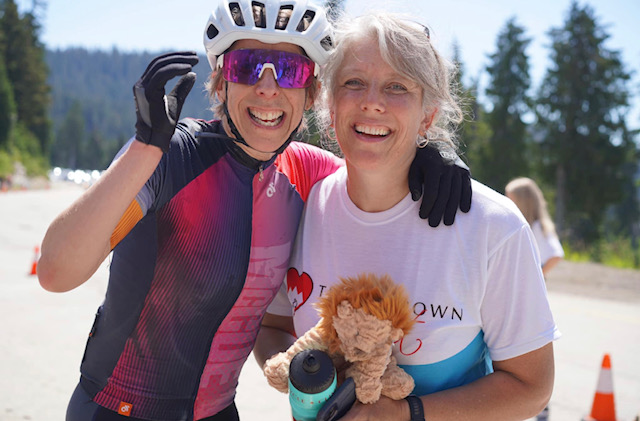
Congratulations to Lynda McCue, who won the lion, finishing 1st overall female (again) and Grant Bullington and Paul Towgood, who were among the top 5 finishers (again).
If you missed the ride this year, please add it to your calendar for next year, July 20th 2024.
Lynda McCue 1st female and Marie Campbell, found, co-chairPaul Towgood and Grant BullingtonKristina interview with CBCMatt Barrow, Jana Keillor, Sara Frederking, Elaine Reid on top of Seymour mountainTrevor McBride, Heidi McBride, Richard Press, Kristina Bangma starting the climb up CypressKristina was diagnosed with ARVC in 2016. She will continue riding for as long as her heart will let her.
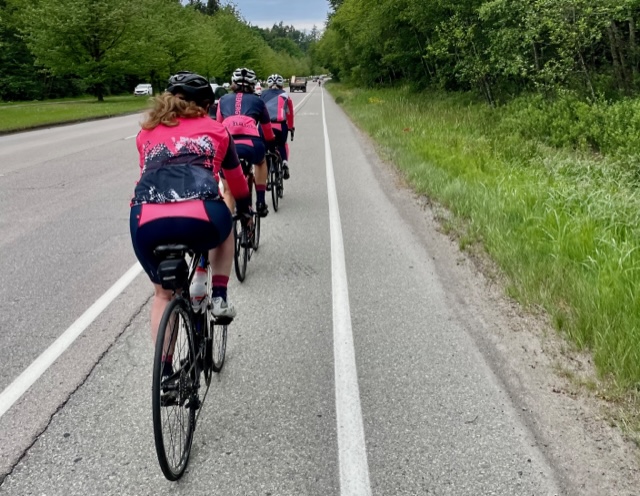
Riding in a pace line is the best way to save energy, and when mastered can make cycling more fun! But, to keep a group safe, everyone must know what their responsibility is, and commit to working together.
The following are 10 tips that will help you on your next group ride.
When leading or pulling, maintain the average speed of the group to keep everyone together. You WILL need to look over your shoulder often, especially on hills, to make sure you haven’t dropped anyone. If you drop a few riders on the climb, wait for them at the top.
Point out obstacles that may be harmful such as rocks, gravel, cars, glass, etc. Pass this information down the line.
If you are getting too close to the person in front of you and need to slow down, try to do so by moving to the right or left of the tire in front of you and sit up taller on your bike to slow yourself down. If this doesn’t work, try to LIGHTLY squeeze both the brakes so your decrease in speed is not sudden or extreme. Do not jam on the brakes as this will cause a domino effect down the line and be disastrous to those in the back of the pack – ie: they will crash.
Remember that the person behind you can only react to what you do so you must ride predictably and avoid any sudden movements or changes in direction. ALL riders must ride in a straight line!
If you are within 1/2 a bike length from each other, ride through intersections and roundabouts as one “vehicle”.
Everyone MUST pull when it is their time or you will confuse the order. If you are tired, you can take a shorter pull – even if it is only 10seconds. If you are a strong rider and can hold the pace easily, you may take a longer pull such as 1 -10 minutes, depending on how long your ride is, and what the group decides is fair.
Do NOT drink, eat, adjust your bike or do anything EXTRA when you are pulling. You have the entire group trusting your judgment and cycling skills so you need to be alert and consistent. If you need to eat, drink or adjust something, pull out and move to the back.
Communicate within the group, letting the lead rider know when they have dropped a rider or when the pace is too fast.
No matter which position you are in the group, pay attention to the road and what is happening in front, behind, and beside you. Do not blindly follow the leader.
When you have finished your pull, move to the left away from the rider behind you, then slow down to allow the group to ride past you. You want to quickly get back in the draft and out of traffic which is not only safer but will also help preserve your energy. NOTE: If you find yourself out in traffic with a car coming behind you, indicate to the rider beside you that you would like to move back in. This rider can slow down and once an opening is made, you can move back into the middle of the line.. You now have a new order – which is fine.
“I’m hate … (fill in the blank) exercise or drill.”
And sure enough, you have proven yourself correct. You suck at climbing, your weak leg can’t do as many reps as your “good” side, and the exercise you hate is as terrible as always.
What if you changed how you spoke to yourself? Why not try boosting yourself up with a positive thought or encouragement instead of negative? How do you think that would change the outcome?
By choosing to look at a situation (that you usually dislike) with positivity and a sense of play, you not only improve your experience, but your thoughts can and will change your reality. Look at every mountain as an opportunity to grow stronger and soon you will become a monster on hills. Imagine your “weak side” as being made of steel, impossible to break, and soon it will become just as strong as the other side. Use those “awful” exercises as a way to build mental strength and resilience so nothing can break you.
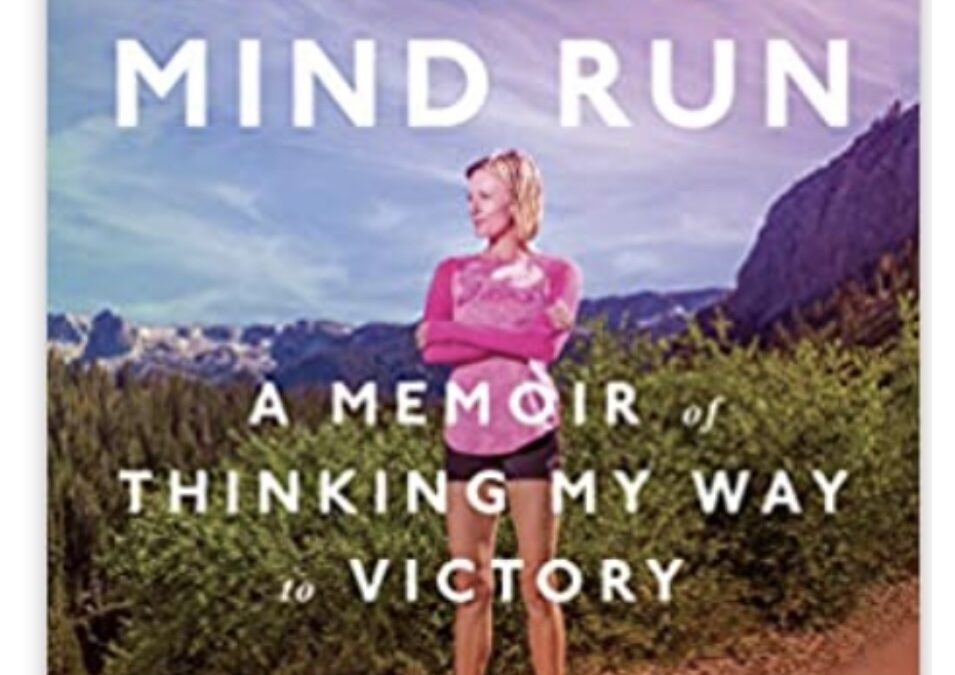
Deena Kastor, Olympic medalist in the marathon and an elite runner in almost every distance wrote an excellent memoir titled, Let Your Mind Run, which I highly recommend for any and every athlete. Deena believes that changing her mindset to become more encouraging, kind, and resilient was the key to her success. I have read many self help books on positive thinking, and I will tell you – this one is unique and interesting to read about the path of an olympian. Her journey is not only inspiring, it is full of ups and downs that, at many times, threatened her career as a runner. In many ways, each of us can relate to her experiences as they include depression, insecurity, losing focus, broken bones, and having children. Even if you do not consider yourself to be competitive, Deena’s practice of having a positive mindset works for all aspects of life.
If you want to learn more about how to change your mindset, specifically for sports and performance, the next book I recommend reading is, In Pursuit of Excellence, by Terry Orlick. The first time I read this book was in 2009 when I was training for Ironman Canada, but I believe it is timeless. This book has practical tips and tools to help you stay focused during training and performance.
Next time you catch yourself thinking, I don’t like …, see if you can reframe it into an opportunity, challenge, or even a game.
Before you can think about climbing faster, you need to make sure that you have first built your aerobic foundation. As the saying goes, “you can’t run before you learn to walk”. To read more about building an aerobic base please go back to the newsletter titled, Building an Aerobic Base.
So once you have set your aerobic base, how do you get faster on hills?
1. Ride lots. Ride lots of hills.
2. When climbing think of form: efficient pedal strokes and relaxed upper body.
3. Learn to pace yourself for the entire length of the climb. Learning what your pace should be will come after riding lots of hills 🙂
4. Give the appropriate amount of effort for the type of hill /ride/workout you are doing that day. Example: In a Spanish Banks workout of 5 hill repeats, you will likely be putting out maximum effort on each – that’s the goal of the workout. But for a long training ride, where Spanish Banks is just one of many on the ride, slow down your pace and take it easy or ride at a pace you can handle, as you still have a long ways to go.
In this newsletter, I’m going to focus on point number 4, which relates to effort.
During training it is important to give the appropriate amount of effort, appropriate for the workout.
In the Kits Energy workouts, your coach will tell you how much effort you should be exerting. If you want to get faster, and get the most benefit from the workout, it is important to follow the instructions. To improve, you need to work beyond your comfort zones into new territory, which should feel uncomfortable. Through proper and adequate (24-48hrs) rest and recovery, your body will adapt to the stress and grow stronger. It is through this process, repeated over and over, that you will gain increased strength and endurance.
BUT….. here is the caveat.
But, if you try adding intensity without a solid base, other rides to support your intensity ride, or you try to progress too quickly, you run the risk of breaking down the body, instead of building it up.
You may get away with it for a month of two but eventually, if you try to increase intensity without a solid base and other rides to support it, it will catch up with you. Your speed and strength will become stagnant and/or you may notice that you are actually slowing down!
When this happens, the tendency is to do more training, with exacerbates the problem.
You may also notice several nagging symptoms that don’t seem to go away. These symptoms are usually a combination of: loss of strength/endurance, chronic fatigue, chronic muscle pain, insomnia, depression, irritation, weight gain, and frequent illness such as colds and flus. If are feeling any of these symptoms, back off on your training for a few weeks until they subside.
When you return to training, build up slowly and create that base again. Always listen to what your body is telling you. If it is too much – back off again. Use the weekly workouts as endurance training instead of a interval training. I know it’s hard on the ego – but your body will thank you in the long run.
Remember, cycling is a lifestyle choice and one that you want to do for as long as your body will let you. Think long term.
Before you start worrying about being a fast(er) climber, you first need to develop a solid aerobic foundation or base.
This is the key to any and all endurance sports.
The time it takes to build your personal aerobic base will be different from other riders and will depend on: 1. the distance you are training for 2. how many years you have been riding 3. how much time you have to train 4. age
But generally speaking, if you are training for an event, you should be comfortable riding a minimum of 2 to 3 hours at a steady state, before you start worrying about being fast(er).
You develop this base by riding slow (HR or Power zone 1 and zone 2) steady rides, and increasing the distance by no more than 10% each week, until you get to or close to your goal distance. Through proper and adequate recovery, your body will adapt and grow stronger. The process, repeated over and over again will result in increased strength and endurance OVER TIME.
Building a base takes time and can’t be rushed so it is vital that you start at least 3-6 months before your event. Sorry, but any last minute “cram training” for endurance sports doesn’t work. Once you have developed a comfortable and solid base, continue maintaining and/or increasing your distance throughout your season.
The workouts that we do in Kits Energy are designed to specifically build strength and power, not endurance. If you are willing to go there – these workouts will push you into new power/heart rate/ pain zones that you aren’t willing to do when you ride alone.
Every time you push yourself to new levels, your body recognizes that it needs to adjust and adapt. As your body gets stronger, your ability to do more work also increases. So if you are waiting for a time for when the workouts will feel easy – that’s not going to happen, because as you get stronger you continue to push yourself harder (hopefully). But, you will notice, that throughout the season your regular riding friends will be having a harder time keeping up with you! Trust the process.
Riding in Vancouver, we plan for the worst and hope for the best.
The most difficult part of spring riding is dressing appropriately. Every day it’s a bit of a gamble. Will you wear too much and have to carry it? Or will you not bring enough and feel chilled all the way to Steveston? Even when you do dress well and appropriately for the weather, it can change quickly, even within one ride.
If you are new to riding or new to riding in Vancouver, please take a moment to watch this short 4 minute video, outlining the clothing and layering you need to stay warm. In this scenario, the temperature is 6 degrees celsius or warmer, and as usual, we expect it to be wet.
With the exception of a waterproof jacket, the Kits Energy store has all of the items you need to stay warm this spring. Please watch your inbox as the store will open the first week of April, with discounts from April 3rd to April 15th. Kits Energy clothing can only be ordered online.
Base Layer
long dry-fit or merino wool socks
dry-fit undershirt – tank top, tee shirt, or long sleeve
padded cycling shorts or padded long bib pants
Second Layer
long tights over padded shorts if not wearing padded long pants
short sleeve or long sleeve jersey or dry-fit shirt
Outer Layer
waterproof rain jacket (if not raining, carry it with you)
long finger light gloves
small beanie or headband to keep your ears warm
helmet
glasses with clear or light coloured lenses (or dark if sunny)